Why You Need to Limit CPU Usage
- You want to run an application 24/7 without it affecting other programs.
- You need to limit a program that constantly uses 100% of your CPU, causing the system to lag and become unusable for other tasks.
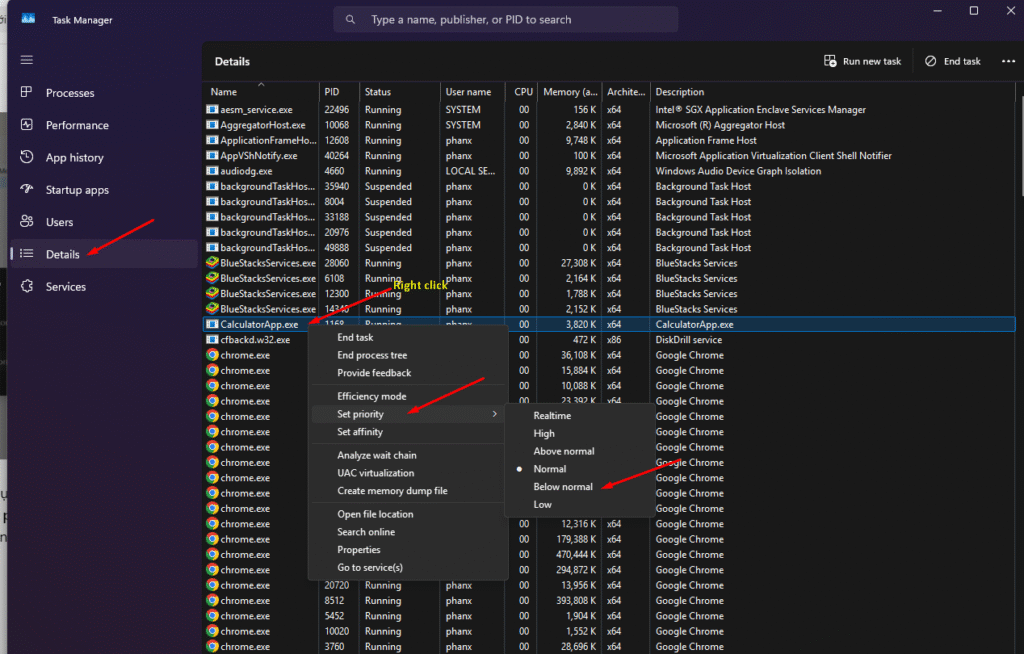
Method 1: Update Process Priority
- Press Ctrl + Shift + Esc to open Task Manager.
- Select the Details tab.
- Right-click the process you want to change, select Set priority, and choose your desired priority level.
- A warning window will pop up. Click Change priority to confirm the change.
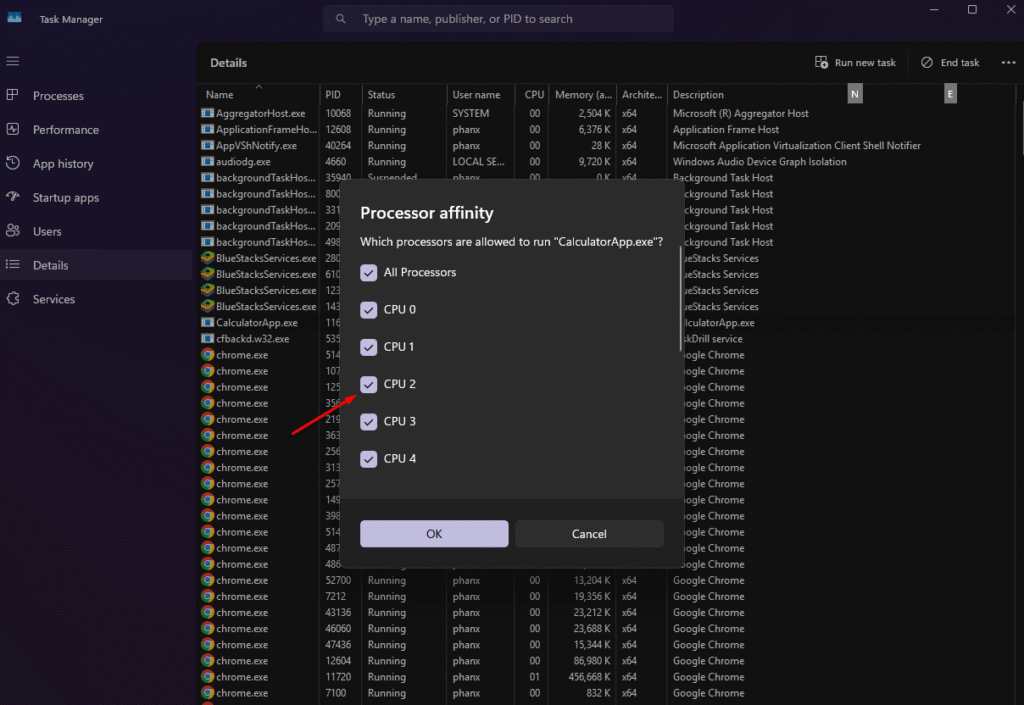
Method 2: Change CPU Affinity
Changing CPU Affinity simply means configuring an application to use fewer CPU cores to reduce its overall CPU consumption.
- Press Ctrl + Shift + Esc to open Task Manager.
- Select the Details tab.
- Right-click the process you want to change and select Set affinity.
- A pop-up will show a list of CPU cores. You can uncheck some cores to limit the number of cores the application can use.
- Click OK to finish.
- Drawback: Windows will reset this configuration after the application is closed.
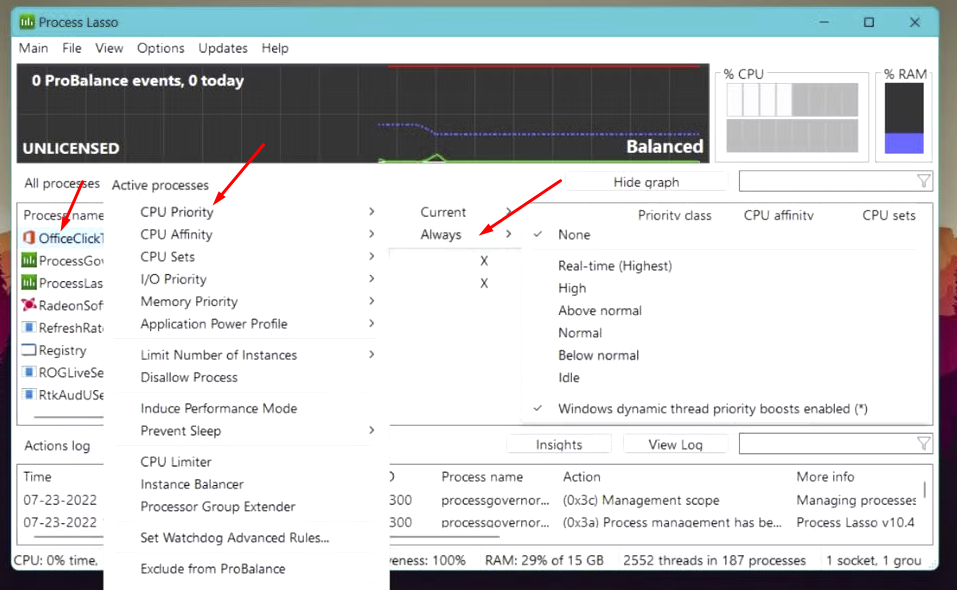
Method 3: Use a Third-Party Application
If you need a more comprehensive solution for managing resource usage, you can use software like Process Lasso.
- Advantage: Your settings will not be lost when you restart applications. You can configure priority and affinity for an application permanently, even after it restarts. Moreover, you can create rules to limit CPU usage by a specific program.
- Download and install Process Lasso.
- Launch the application.
- Right-click the process you want to configure, and choose your desired priority or affinity.
- Select “Current” if you only want the settings to be effective until the application is closed. Select “Always” if you want the settings to be permanent.
Method 4: Change the Maximum CPU Performance
This method sets the maximum performance for the entire CPU, rather than for individual applications.
- Click Apply and then OK. Your CPU will now only run at a maximum of 75% of its capacity.
- Open Control Panel, then select Power Options.
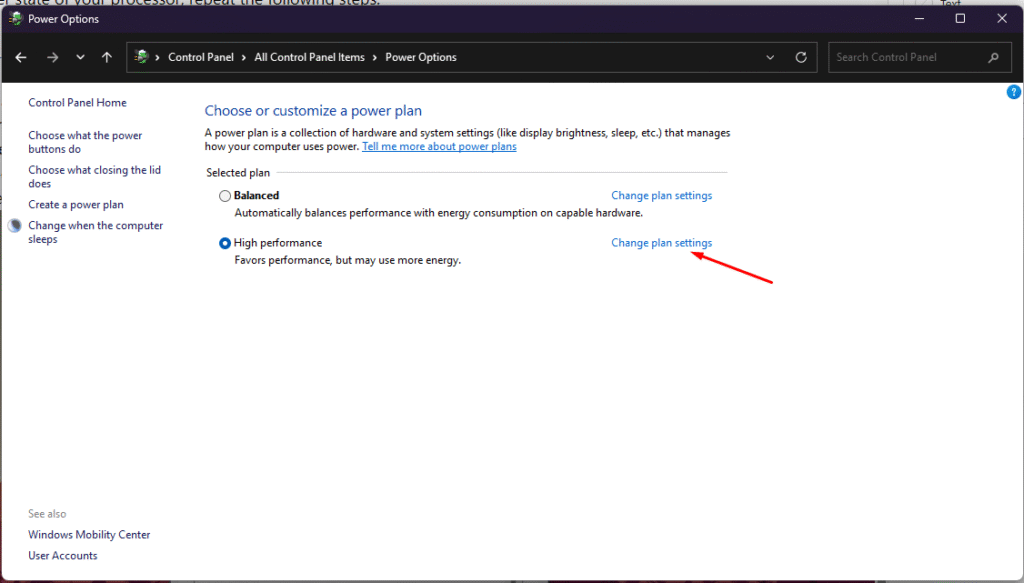
- Click on Change plan settings next to your active power plan. Then, select Change advanced power settings. Choose the Processor Power Management option. Click on Maximum processor state and set your desired value (e.g., 75%). The default is 100%.

- Click Apply, OK. From now CPU only run at maximum 75% power